Getting rid of body hair from time to time is important, not because of any beauty standard or to follow any norms set by society. Instead, it is important to maintain body hygiene. And this is not only limited to women but also to men. Removal of unwanted hair from the body benefits as you get smoother and cleaner skin. It can also reduce the risk of irritation and infection caused by sweat and dirt that accumulate on the skin. Additionally, it can make you feel more confident and attractive. Hair removal is a common practice for many people as it can prove to be aesthetically pleasing.
There are various ways to remove hair from the body like shaving, waxing, tweezing, and even laser hair removal. Each of these methods has its advantages and disadvantages and should be carefully considered before choosing which one to use.
There is no such "right method” to remove the hair as it can differ from the needs of person to person. The major factors to choose the way to remove hair are skin type, hair growth rate, budget, hair type and not to mention the amount of time a person is willing to spend.
Waxing is the most common method to free the skin from hair temporarily. People prefer salons for satisfactory results, but if you have experience and a professional wax heater at home, you can do it yourself. Not to mention, using a wax heater in the right way, when removing hair is important.
This step-by-step tutorial will guide you through the process of using a wax heater for effective hair removal in the comfort of your own home. Moreover, you will be aware of the process of waxing, so when receiving the service in a salon, you will know exactly what you are getting.
Step 1: Gather supplies
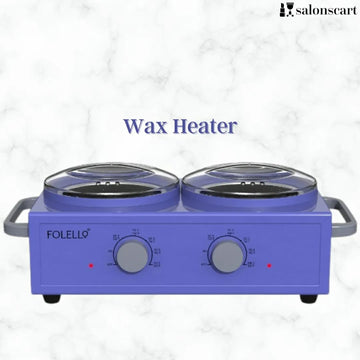
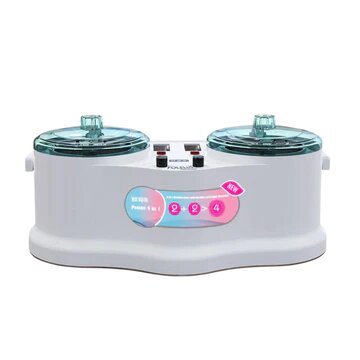
- Wax Heater - A wax heater is a device used to heat the wax to the appropriate temperature for hair removal, making the process faster and easier. Here, you can find a high-quality wax warmer heater for a salon that can be used at home also.

- Wax - Depending on the season, your skin type and the result you desired, you can choose a wax accordingly. Always go for a quality product and read the label to know if there is any ingredient mixed in the product which can harm your skin.
- Pre-waxing Oil - The pre-waxing oil creates a barrier between the wax and the skin to make the waxing process smoother and less painful. It also reduces wax to the skin, making wax removal easier.
- Waxing spatula - It is a tool to spread wax on the skin. They come in various shapes and sizes and can either be made from metal or plastic.
- Post-waxing Oil or Lotion - By applying the post-waxing lotion your skin will restore its softness and become hydrated. It is applied to reduce redness, inflammation, and irritation if any. Further, it prevents ingrown hairs.
Step 2: Prepare your skin
Before applying wax, it is important to free your skin from oil, dust, lotion and sweat. By exfoliating the skin, you can also open up the pores and ease the process. Make sure your skin is dry and your body hairs are not too long (trim before waxing). Do not forget to apply a pre-waxing oil.
Step 3: Set up the wax heater
Different wax heaters have different settings. You can refer to the manufacturer's instructions to set up your wax heater. Plug it in and adjust the temperature according to the wax type you're using. Make sure the wax is neither too hot nor too cold. It's recommended to start with a lower temperature and gradually increase if needed. Allow the wax to melt completely until it reaches a smooth, liquid consistency.

Step 4: Apply wax.
Using a waxing spatula, apply a thin layer of wax in the direction of hair growth. Ensure you spread it evenly and leave a small edge for easy gripping. Be cautious and avoid applying wax to sensitive areas, such as the eyelids, lips, or any broken or irritated skin. Work in small sections to make the process easier.
Step 5: Remove the hair
Once the wax has cooled and hardened slightly (but not completely), hold the skin taut with one hand and use the other hand to quickly twist the waxing strip in the opposite direction of hair growth. You should pull the strip parallel to the skin in one swift motion. Remember to breathe as you pull to minimize discomfort.
Step 6: Soothe and care for your skin
After waxing, use a post-waxing oil or lotion to soothe and moisturize your skin. This step reduces the redness or irritation caused by waxing. Avoid using harsh soaps or exfoliants immediately after waxing, as this can further irritate the skin. Additionally, refrain from exposing the waxed area to direct sunlight for at least 24 hours.
Conclusion
Waxing can be a great way to remove unwanted hair. Taking the proper precautions and following the steps outlined above can help ensure a smooth and irritation-free waxing experience.